Blog Layout

How to Insulate Drywall in Older Homes

July 18, 2024

Insulating drywall in older homes can be a challenging but rewarding task. Older homes often lack the modern insulation standards, leading to energy inefficiency, higher utility bills, and less comfort. Calgary Drywallers is here to guide you through the process of insulating drywall in older homes, ensuring your home becomes more energy-efficient and comfortable. Here’s how to get started.


1. Assess the Current Insulation

Before beginning any insulation project, it's essential to assess the existing insulation (if any) in your walls. This can be done by:

  • Inspecting the Walls: Remove small sections of drywall to check for existing insulation.
  • Using an Infrared Camera: This tool can detect heat loss areas, indicating where insulation is lacking.


2. Choose the Right Insulation Material

Selecting the appropriate insulation material is crucial for the effectiveness of the project. Here are some common options:

  • Fiberglass Batts: These are easy to install and fit snugly between wall studs.
  • Blown-In Cellulose: Ideal for filling irregular spaces and adding insulation to existing walls without removing all the drywall.
  • Spray Foam: Provides excellent insulation and air sealing but is more expensive and requires professional installation.
  • Rigid Foam Boards: Suitable for walls with limited space, offering high insulation value with a thin profile.


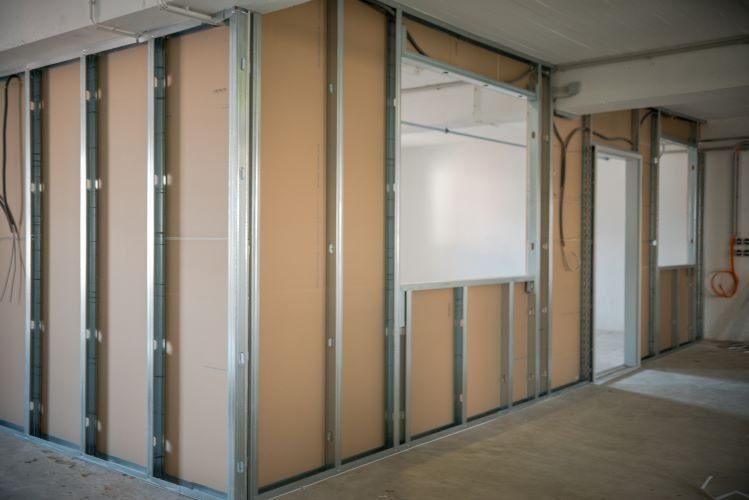
3. Prepare the Walls

Once you’ve assessed the insulation and chosen your material, the next step is preparing the walls:

  • Remove Old Drywall: If necessary, carefully remove the existing drywall to expose the wall cavities.
  • Seal Gaps and Cracks: Use caulk or expanding foam to seal any gaps, cracks, or holes in the wall to prevent air leakage.
  • Check for Moisture Issues: Ensure there are no signs of moisture or mold, as these need to be addressed before adding insulation.


4. Install the Insulation

Depending on the chosen material, the installation process will vary:

  • Fiberglass Batts: Cut the batts to fit snugly between the studs, ensuring there are no gaps. Staple them into place if necessary.
  • Blown-In Cellulose: Create small holes in the wall and use a blowing machine to fill the wall cavities with cellulose. Seal the holes afterward.
  • Spray Foam: Apply the foam directly into the wall cavities, allowing it to expand and fill the space. Trim any excess once it’s cured.
  • Rigid Foam Boards: Cut the boards to fit between the studs, securing them with adhesive or screws. Seal the edges with tape or foam.


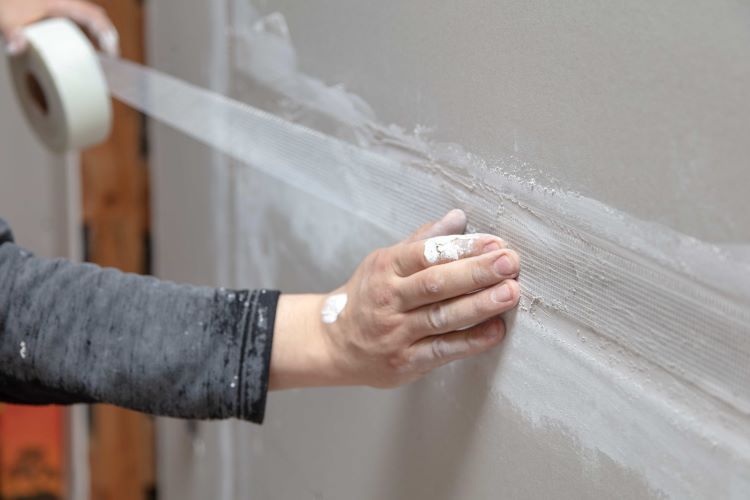
5. Reinstall Drywall

After the insulation is installed, it's time to replace the drywall:

  • Measure and Cut Drywall: Measure the wall dimensions and cut the drywall sheets to fit.
  • Secure the Drywall: Use drywall screws to attach the sheets to the wall studs.
  • Finish the Drywall: Tape the seams, apply joint compound, and sand the surface smooth. Finally, prime and paint the drywall.


6. Consider Additional Measures

For optimal insulation and energy efficiency, consider these additional measures:

  • Vapor Barriers: Install a vapor barrier if moisture control is a concern.
  • Air Sealing: Ensure that all potential air leaks, such as around windows and doors, are properly sealed.
  • Insulating Outlets and Switches: Use foam gaskets to insulate electrical outlets and switches on exterior walls.


Benefits of Insulating Drywall in Older Homes

Properly insulating drywall in older homes offers numerous benefits:

  • Energy Efficiency: Reduces heating and cooling costs by preventing heat loss in the winter and heat gain in the summer.
  • Comfort: Maintains a more consistent indoor temperature, improving overall comfort.
  • Soundproofing: Insulation also acts as a sound barrier, reducing noise from outside and between rooms.
  • Increased Home Value: Enhanced energy efficiency and comfort can increase the resale value of your home.


Trust Calgary Drywallers for Your Insulation Needs

At Calgary Drywallers, we understand the unique challenges of insulating older homes. Our experienced team is dedicated to providing high-quality insulation solutions tailored to your specific needs. Whether you’re looking to improve energy efficiency, comfort, or overall home value, we have the expertise to help you achieve your goals.


Insulating drywall in older homes is a worthwhile investment that can significantly enhance energy efficiency, comfort, and home value. With careful assessment, the right materials, and professional installation, you can transform your older home into a more comfortable and energy-efficient space.


Contact Calgary Drywallers today to learn more about our insulation services and how we can help you improve your home.

You might also like

December 2, 2024
When it comes to drywall installation , achieving a flawless finish is the ultimate goal. However, even a perfect installation can lead to frustration if cracks and dents appear over time. As a homeowner or contractor in Calgary, you want durable and long-lasting walls. Here’s how to ensure your drywall stays smooth and crack-free for years to come. 1. Start with Proper Installation Techniques The foundation of crack-resistant drywall lies in meticulous installation: Secure Fastening: Use screws rather than nails to attach drywall to studs, as screws are less likely to loosen over time. Ensure they are properly countersunk but not overly tight, which can weaken the drywall. Adequate Spacing: Maintain a 1/8-inch gap between sheets to allow for natural expansion and contraction. Use a drywall spacer for consistency. Proper Stud Alignment: Ensure studs are straight and evenly spaced at 16 or 24 inches apart to prevent uneven pressure on the drywall sheets. 2. Choose the Right Materials The type of drywall and joint compound you use significantly impacts its durability: Moisture-Resistant Drywall: In Calgary's variable climate, moisture can lead to cracks. Use moisture-resistant drywall in areas like basements or bathrooms to reduce expansion-related damage. Flexible Joint Compound: Opt for a high-quality, flexible joint compound to better withstand shifts in your home’s structure. 3. Perfect the Taping and Mudding Process A professional finish relies on seamless taping and mudding: Embed Tape Properly: Use paper tape for stronger seams and ensure it is fully embedded in the joint compound to prevent peeling or cracking. Layer Gradually: Apply three thin coats of joint compound, allowing each coat to dry fully before sanding and adding the next layer. This creates a smooth, crack-free surface. Feather Edges: Feathering the edges of each layer minimizes bumps and reduces the likelihood of dents during sanding. 4. Minimize Structural Movement Homes naturally shift over time, but there are ways to mitigate its impact: Control Moisture Levels: Install dehumidifiers in high-humidity areas to prevent drywall from absorbing moisture and expanding. Ensure Strong Foundations: Cracks often appear due to foundation issues. Regularly inspect and maintain your home’s foundation to prevent structural shifting. 5. Protect During and After Installation Dents and damage often occur during construction or daily use: Avoid Impact: Use corner bead protectors and baseboard trims to shield vulnerable areas from furniture and foot traffic. Primer and Paint: Apply a high-quality primer before painting to seal the drywall surface and add an extra layer of protection. 6. Hire Professionals for Lasting Results DIY drywall installation can lead to common mistakes that compromise its durability. Hiring experienced professionals like Calgary Drywallers ensures your walls are installed and finished with expert precision, minimizing the risk of future damage. Conclusion Cracks and dents in drywall are avoidable with proper techniques, quality materials, and a focus on preventing structural movement. At Calgary Drywallers , we specialize in durable, flawless drywall installation tailored to Calgary's unique environment. Need expert drywall services? Contact Calgary Drywallers today for a consultation and let us bring your vision to life!
November 24, 2024
Drywall taping can be a daunting task, especially when dealing with large seams. Large seams require extra attention and precision to ensure a flawless, professional finish. At Calgary Drywallers , we specialize in helping homeowners and contractors achieve perfect results, whether you’re tackling a DIY project or need professional assistance. Here’s a step-by-step guide to taping large drywall seams without errors. Step 1: Gather the Right Tools and Materials Before you begin, ensure you have the following tools and materials on hand: Drywall tape: Choose between paper tape or mesh tape. Paper tape is stronger but requires more skill to apply, while mesh tape is self-adhesive and easier for beginners. Joint compound (mud): Lightweight or all-purpose joint compound works best. Taping knives: A 6-inch knife for initial application and a 10- or 12-inch knife for smoothing. Mud pan: For holding joint compound during application. Sanding block or drywall sander: For a smooth finish after the compound dries. Step 2: Prepare the Seam Preparation is key to successful drywall taping. Clean the seam: Remove dust, debris, and any loose drywall particles from the seam. Check for gaps: For large gaps (wider than 1/4 inch), fill with joint compound first and allow it to dry before taping. Prime the surface: Lightly apply a thin coat of joint compound to create a base for the tape to adhere to. Step 3: Apply the Drywall Tape Cut the tape: Measure and cut a length of tape that fits the seam. Place the tape: For paper tape, embed it into the wet compound you applied during priming. For mesh tape, simply stick it directly to the seam. Smooth the tape: Use your 6-inch taping knife to flatten the tape and remove excess compound, ensuring no bubbles or wrinkles are present. Step 4: Apply the First Coat of Joint Compound Spread the compound: Using your 6-inch knife, apply a thin layer of joint compound over the tape. Feather the edges: Extend the compound slightly beyond the edges of the tape to create a seamless blend with the drywall. Inspect for bubbles: Smooth out any air bubbles or irregularities. Allow this first coat to dry completely, typically 24 hours. Step 5: Apply Additional Coats Switch to a wider knife: Use a 10- or 12-inch taping knife for subsequent coats to feather the compound further out. Build up the seam: Apply two or three thin coats, letting each layer dry before applying the next. Sand between coats: Lightly sand each layer to remove ridges and ensure smoothness. Step 6: Finish and Sand Once the final coat is dry: Sand the seam: Use a sanding block or drywall sander to create a perfectly smooth surface. Inspect your work: Run your hand along the seam to check for any uneven areas or rough spots. Clean up: Wipe away dust with a damp cloth. Pro Tips for Large Drywall Seams Work in manageable sections: Focus on one part of the seam at a time to avoid rushing. Keep your tools clean: Regularly clean your knives and mud pan to prevent dried compound from ruining your work. Use proper lighting: Good lighting will help you spot imperfections as you work. Be patient: Allow each coat to dry completely before sanding or applying the next layer. When to Call the Pros Large drywall seams can be challenging, especially for beginners. If you’re unsure about tackling the task yourself or want a flawless finish, Calgary Drywallers is here to help. Our team of experts has years of experience handling all types of drywall projects, ensuring a professional result every time. Contact Calgary Drywallers today for expert drywall taping services and make your walls look as seamless as possible! 
November 17, 2024
When it comes to building strong and durable walls, the choice of materials for drywall framing is crucial. Traditionally, wood has been the go-to option, but metal studs have been gaining popularity in both residential and commercial construction. At Calgary Drywallers , we’ve seen firsthand the advantages of using metal studs in drywall framing projects across Calgary, Alberta. If you’re considering a renovation or new build, here’s why you should think about metal studs for your next drywall framing job. Why Choose Metal Studs for Drywall Framing? Metal studs are made from galvanized steel, which is lightweight yet incredibly strong. They are designed to support drywall panels and other wall materials while providing a sturdy framework. But what makes them a better option than traditional wood studs? Let’s explore the benefits. 1. Durability and Longevity One of the biggest advantages of metal studs is their durability. Unlike wood, metal studs won’t warp, twist, or shrink over time. They are resistant to moisture, termites, and other pests, making them an ideal choice for Calgary’s varying weather conditions. With metal studs, you can be assured that your walls will remain straight and stable for years to come. Key Benefits: No warping or twisting Resistant to pests and moisture Longer lifespan than wood studs 2. Fire Resistance Safety is always a top priority in construction, especially in residential homes. Metal studs are non-combustible, meaning they won’t catch fire, spread flames, or emit harmful smoke. This fire-resistant quality can be a lifesaver, offering an extra layer of protection to your home or commercial building. Key Benefits: Non-combustible and fire-resistant Enhances the safety of your property Meets building code requirements for fire safety 3. Lightweight and Easy to Handle Another advantage of metal studs is their lightweight nature. They are much lighter than wood, making them easier to transport and handle during the installation process. This not only speeds up the construction timeline but also reduces labor costs. Key Benefits: Easier to carry and install Reduces fatigue for workers Speeds up the framing process 4. Cost-Effective Over Time While metal studs might be slightly more expensive upfront compared to wood, they are more cost-effective in the long run. Their resistance to moisture and pests means fewer repairs and replacements down the line, saving you money on maintenance costs. Additionally, metal studs are often made from recycled materials, making them a more sustainable choice. Key Benefits: Lower long-term maintenance costs Potentially lowers insurance premiums due to fire resistance Eco-friendly and recyclable 5. Consistency and Precision Metal studs are manufactured to precise specifications, ensuring that each stud is straight and uniform. Unlike wood, which can have knots, bends, or other imperfections, metal studs provide a consistent framework for your drywall. This precision makes it easier to achieve a smooth, professional finish on your walls. Key Benefits: Consistent size and shape Eliminates the need for shimming or adjustments Results in a higher-quality finish 6. Better Soundproofing If soundproofing is a concern, metal studs can help. When combined with soundproof drywall and insulation, metal studs can create a more effective sound barrier compared to wood. This makes them an excellent choice for home offices, bedrooms, and commercial spaces where noise control is important. Key Benefits: Enhances soundproofing capabilities Ideal for multi-family residences and office spaces Reduces noise transfer between rooms 7. Resistant to Mold and Mildew Calgary’s fluctuating weather can create moisture issues in homes, leading to mold and mildew growth. Metal studs are naturally resistant to mold, providing a healthier indoor environment. This makes them especially beneficial in basements, bathrooms, and other high-humidity areas. Key Benefits: Reduces the risk of mold and mildew Promotes healthier indoor air quality Ideal for moisture-prone areas 8. Flexibility in Design Metal studs are incredibly versatile and can be used in a wide range of construction projects, from framing walls to creating curved or non-standard designs. They’re easy to cut and shape, allowing for greater flexibility in architectural designs. Key Benefits: Suitable for custom wall designs Easy to cut and modify Supports creative architectural projects Conclusion: Is Metal Framing Right for Your Project? Choosing the right framing material is essential for the success of your drywall project. While wood studs have their place, the benefits of metal studs make them a superior option for many applications, especially in areas prone to moisture, fire, or pest issues. At Calgary Drywallers , we specialize in both metal and wood framing, ensuring that you get the best solution for your needs. If you’re planning a renovation or new build in Calgary, reach out to our team for a consultation. We’ll help you decide if metal studs are the right choice for your project and provide a professional installation that meets the highest industry standards. Contact Us Today! Ready to upgrade your drywall framing? Contact Calgary Drywallers today for a free quote and consultation. Whether you're renovating a basement, building an addition, or starting from scratch, we're here to help you every step of the way.
More Posts

Request A Free Estimate!

Share by: