Drywall Taping Techniques for Corners and Angles
Drywall taping is an essential part of achieving a polished and professional finish for any drywall installation. While taping flat seams is relatively straightforward, tackling corners and angles can be more challenging. For homeowners in Calgary looking to ensure their drywall projects are completed to the highest standard, mastering these techniques is crucial. In this article, we’ll explore the best practices for drywall taping in corners and angles, helping you achieve a seamless and durable finish.
The Importance of Proper Drywall Taping
Before diving into the techniques, it's important to understand why proper drywall taping is essential. Taping and mudding the joints between drywall sheets strengthens the overall structure, prevents cracks, and creates a smooth surface ready for painting or finishing. Proper taping in corners and angles is particularly important because these areas are more prone to movement and stress, which can lead to cracks and damage over time.
Tools and Materials Needed
For successful drywall taping, you’ll need the following tools and materials:
- Joint compound (mud)
- Drywall tape (paper or fiberglass mesh)
- Corner bead (for outside corners)
- Taping knives (4-inch, 6-inch, and 12-inch)
- Mud pan
- Sanding sponge or sandpaper
- Utility knife
- Measuring tape
Inside Corners
Step 1: Apply the First Coat of Mud
Start by applying a thin coat of joint compound to both sides of the inside corner using a 4-inch taping knife. Spread the mud evenly, ensuring it extends about 2 inches out from the corner on each side.
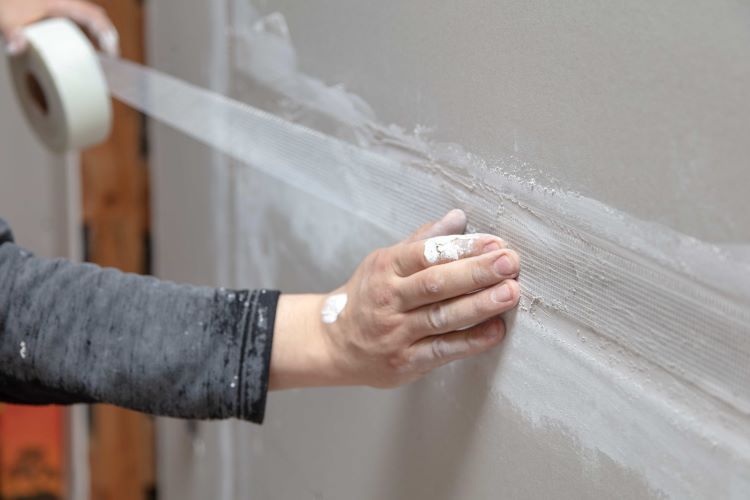
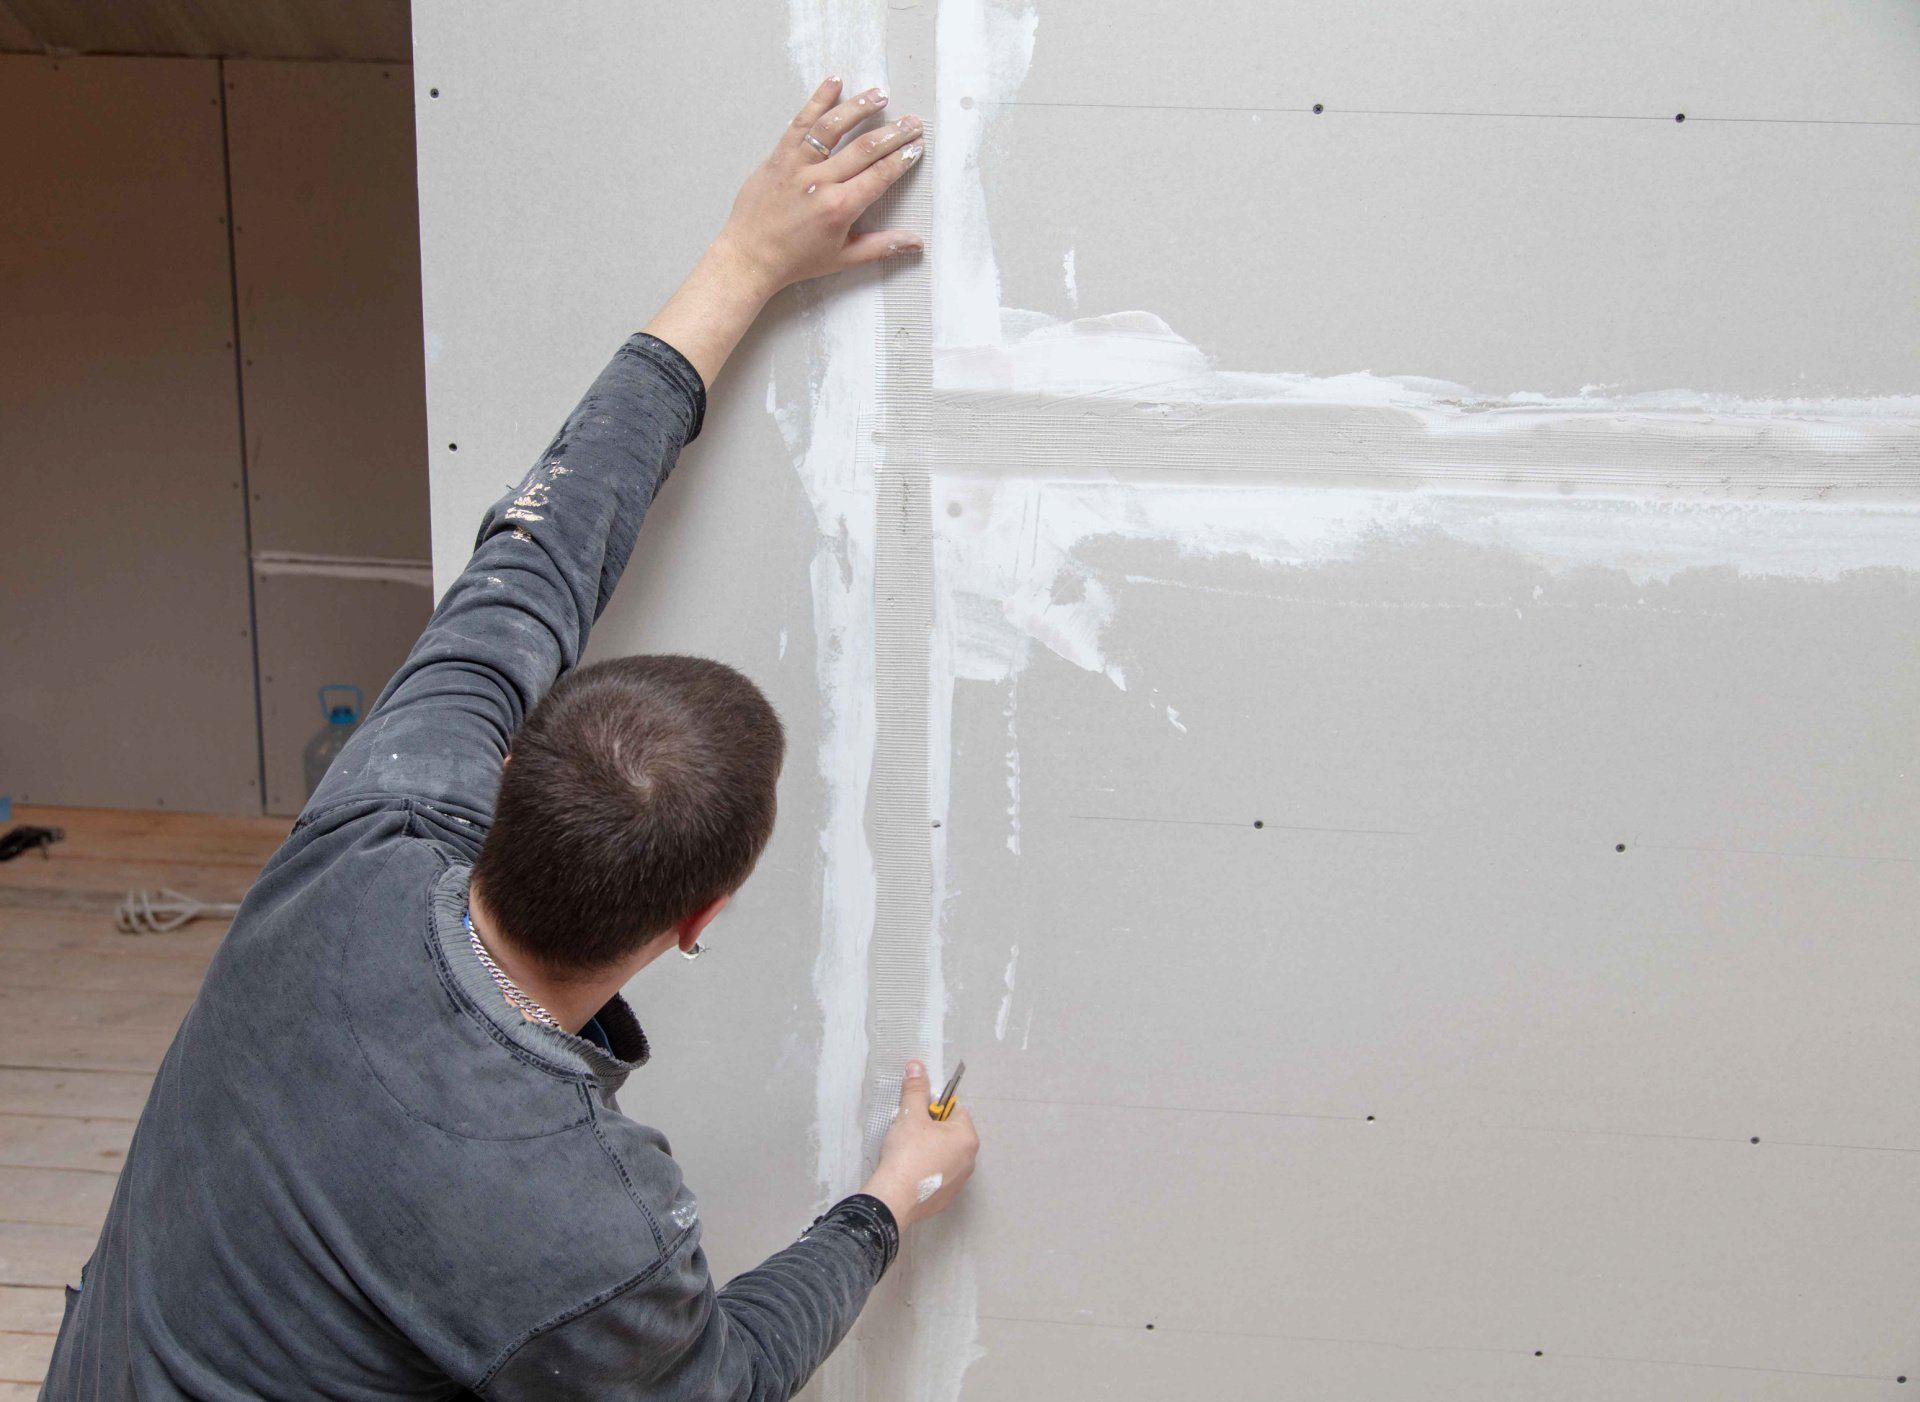
Step 2: Place the Tape
Cut a piece of paper drywall tape to the length of the corner. Fold the tape in half lengthwise to create a crease. Press the tape into the corner, making sure the crease fits snugly. Use your fingers to smooth the tape against the wall lightly.
Step 3: Smooth the Tape
Using the 4-inch taping knife, gently smooth the tape into the mud, starting from the top and working your way down. Ensure there are no air bubbles or wrinkles in the tape.
Step 4: Apply Additional Coats
Once the first coat is dry, apply a second coat of joint compound over the tape, extending the mud about 6 inches out from the corner on each side. Use a 6-inch knife for this step. After the second coat dries, apply a third, wider coat using a 12-inch knife, feathering the edges to blend it with the surrounding wall. Sand between coats as needed.
Outside Corners
Step 1: Attach the Corner Bead
Outside corners require a corner bead to protect the edge and create a clean line. Cut the corner bead to the length of the corner using a utility knife or tin snips. Position the bead on the corner and secure it with drywall nails or screws, spaced about 8 inches apart.
Step 2: Apply the First Coat of Mud
Using a 6-inch knife, apply a thin coat of joint compound over the corner bead, covering the metal and feathering the edges out onto the drywall. Allow it to dry completely.
Step 3: Apply Additional Coats
Once the first coat is dry, apply a second, wider coat of joint compound, extending the mud about 6 inches out from the corner on each side. Use the 12-inch knife for this step. After the second coat dries, apply a third coat, feathering the edges to blend it with the surrounding wall. Sand between coats as needed to achieve a smooth finish.
Angled Ceilings and Sloped Walls
Angled ceilings and sloped walls present unique challenges for drywall taping. Follow these steps to achieve a professional finish:
Step 1: Apply the First Coat of Mud
Use a 4-inch knife to apply a thin coat of joint compound along the angle where the ceiling meets the wall.
Step 2: Place the Tape
Cut a piece of paper tape to the length of the angle and fold it in half lengthwise. Press the tape into the angle, ensuring it fits snugly along the crease. Smooth it with your fingers.
Step 3: Smooth the Tape
Use the 4-inch knife to smooth the tape into the mud, starting from one end and working your way to the other. Ensure there are no air bubbles or wrinkles.
Step 4: Apply Additional Coats
Apply a second coat of joint compound over the tape once the first coat is dry, extending the mud about 6 inches out from the angle on each side. Use a 6-inch knife for this step. Apply a third coat, feathering the edges with a 12-inch knife, and sand between coats as needed.
Conclusion
Taping corners and angles in drywall requires patience and precision, but with the right techniques, you can achieve a seamless and professional finish. For homeowners in Calgary, mastering these skills will ensure your drywall projects stand the test of time. However, if you’re unsure or want to guarantee perfect results, consider hiring professionals like Calgary Drywallers. Our team of experts is ready to help you achieve the flawless finish your home deserves.
Contact us today to learn more about our services and how we can assist with your next drywall project.
You might also like