Blog Layout

Finishing your basement

Jan 18, 2024

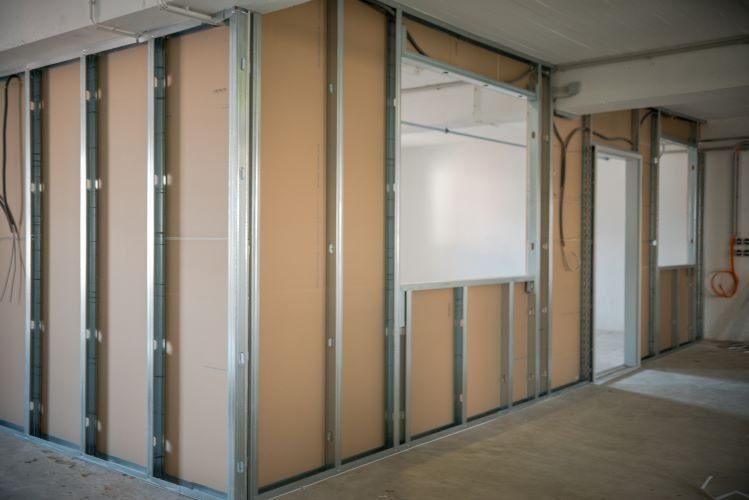
Why finish your unfinished basement? There are many reasons why it makes sense to take advantage of all the benefits that come with finishing the space in your basement. While this can often feel like a daunting task that is easy to put off for a long time, it can also be one of the most rewarding experiences once it is complete. Getting your basement finished is also not as an extensive project as many think, especially when you hire a professional company to complete the work for you. Whether you have a small space that needs to be drywalled, or a large 1500 sq ft basement that needs to be totally finished from top to bottom, our team can help and make the transformation an unforgettably experience! But if you need to hear some of the benefits before making your decision, then this article is for you! Here are several amazing benefits of finishing an unfinished basement.


- Improved value for your home - A finished basement adds real value to any existing foundation, which means you can remodel for much less than it would cost to build new. You can decide between a variety of options depending on your space, such as a separate entrance and an additional living space, a large entertainment area, or even a wine cooler and a bar! The possibilities are truly endless when it comes to finishing your basement.


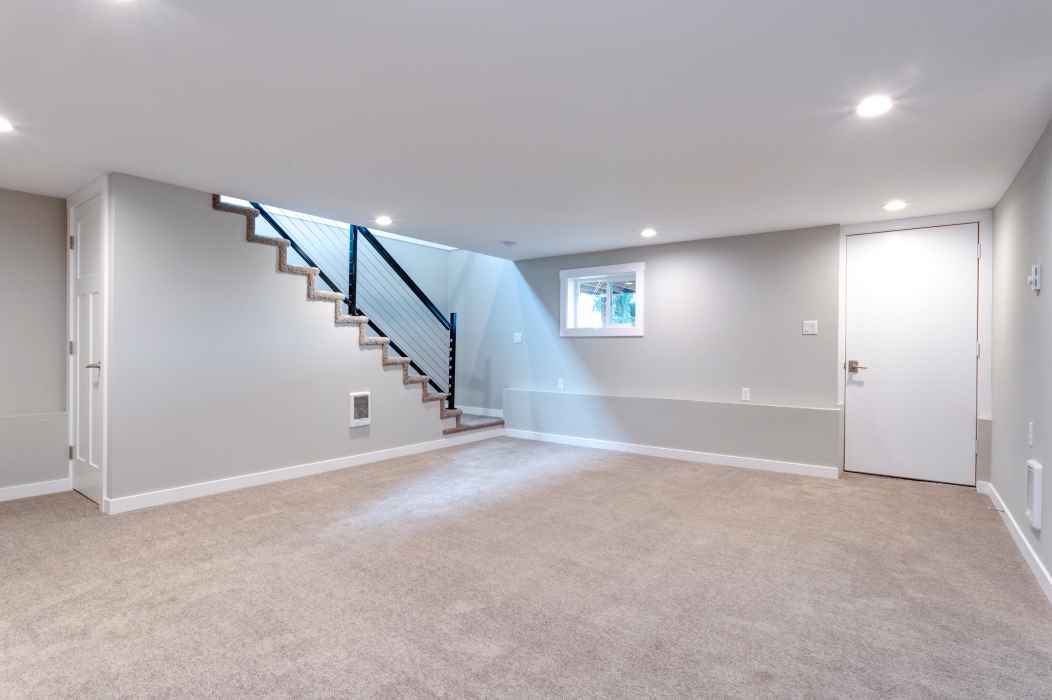
- Useable extra living space - If you're looking to find more room for your growing family or just need additional storage close by, having a finished basement provides the perfect amount of usable living space without adding too much bulk. Additional rooms can also be added if you have the space, so you could add a gym in one area, and extra storage in another room.


- Additional work and entertainment area - Your household will have a place to host guests and spend time together as an entire family after you finish your basement. Use it as an additional work space when there is not enough room in the garage, or a relaxing media room for movie nights.


- Personalized design and ability to add a kitchen - Finish a basement and you'll have all the benefits that come with finished spaces such as no water damage from leaky pipes or ducts, no danger of mold growth from moist ground underneath, minimal noise transmission between floors above, and no contamination from damp surfaces. The design possibilities are endless when finishing a basement!


-Increase value/livability - Another option with a basement is to add another full washroom which would not only add a large amount of resale value to your property, but it would increase the livability for you and your family as well. Having another shower and toiletry area is always a huge bonus for any living space! 


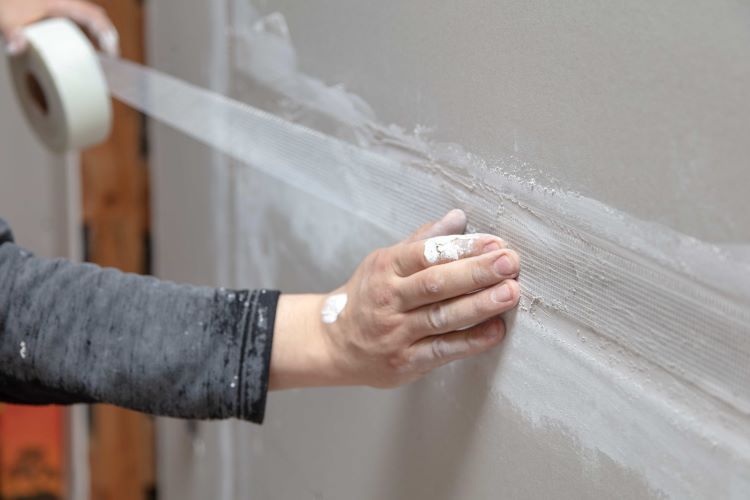
Our drywall and renovation company in Calgary offers construction services for any renovation related needs including electrical wiring installation, plumbing repairs, concrete laying or foundation leveling service. Now that you know why it makes sense to finish your unfinished basement, have you started looking at different designs? There are endless possibilities. Feel free to contact us at anytime to get started on your next project! 


You might also like

20 May, 2024
Finishing drywall in your garage can transform it from a simple storage space into a functional and attractive part of your home. Whether you want to create a workshop, a home gym, or simply a more organized area, properly installed and finished drywall is key. At Calgary Drywallers, we specialize in delivering high-quality drywall services to meet your needs. Here’s a step-by-step guide to finishing drywall in a garage . Step 1: Preparing the Space Before you begin, it’s important to prepare the garage space thoroughly: Clear and Clean the Area Remove all items from the garage, including shelves, tools, and vehicles. Clean the walls and floor to ensure a dust-free environment, which will help the drywall adhesive and mud adhere better. Inspect for Insulation and Electrical Work Ensure that the walls are properly insulated. This is crucial for energy efficiency and temperature regulation. Check that all electrical wiring, outlets, and fixtures are installed and up to code. Make any necessary adjustments before proceeding. Step 2: Measuring and Cutting the Drywall Measure the Walls and Ceiling Use a tape measure to get accurate measurements of the walls and ceiling. Measure twice to ensure precision. Cut the Drywall Panels Use a utility knife to cut the drywall panels to the appropriate sizes. A straight edge will help you make clean, straight cuts. Mark and Cut Openings Mark locations for electrical outlets, switches, and any other fixtures on the drywall panels. Use a drywall saw to cut out the marked sections. Step 3: Installing the Drywall Attach Drywall to the Ceiling First Begin by attaching drywall panels to the ceiling. This can be a two-person job, so having a helper is beneficial. Use drywall screws to secure the panels to the ceiling joists, spacing screws about 12 inches apart. Secure Drywall to the Walls Starting from the top, attach the drywall panels to the wall studs using drywall screws. Ensure the panels fit snugly against each other to minimize gaps. Continue attaching panels down the wall, cutting and fitting pieces as necessary. Step 4: Taping and Mudding Apply Drywall Tape Cover all seams between drywall panels with drywall tape. Use a taping knife to press the tape firmly into place. First Coat of Joint Compound (Mud) Apply a thin layer of joint compound over the taped seams and screw holes using a taping knife. Feather the edges of the compound to ensure a smooth transition between the drywall and the mud. Let it Dry Allow the first coat of joint compound to dry completely. This typically takes about 24 hours. Sand and Repeat Once dry, lightly sand the first coat to smooth out any imperfections. Apply a second coat of joint compound, feathering the edges again, and let it dry. Sand the second coat and apply a third, if necessary, for a perfectly smooth finish. Step 5: Priming and Painting Apply Primer After the final sanding, apply a coat of primer to the entire surface. Primer helps the paint adhere better and covers any imperfections. Paint the Drywall Once the primer is dry, paint the walls and ceiling with your chosen color. Use high-quality interior paint for a durable, professional finish. Step 6: Final Touches I nstall Baseboards and Trim Reinstall or replace any baseboards and trim to complete the look of your finished garage. Clean Up Remove any protective coverings and clean the area thoroughly. Organize Your Space Return your items to the garage, organizing them neatly to maximize the newly finished space. Conclusion Finishing drywall in your garage can significantly enhance its functionality and appearance. By following these steps, you can achieve a professional-looking result that meets your specific needs. At Calgary Drywallers, we offer expert drywall services to help you complete your garage project efficiently and effectively. Contact us today to get started on transforming your garage into a beautiful, useful space.
17 May, 2024
Popcorn ceilings, also known as acoustic or textured ceilings, were once a popular design trend in the mid-20th century. However, many homeowners today find them outdated and opt for a smoother, more modern finish. If you're considering removing your popcorn ceiling, there are several factors to keep in mind. At Calgary Drywallers, we want to ensure you're fully prepared for this home improvement project. Here are the key things to consider when removing popcorn ceilings . **Asbestos and Safety Concerns Asbestos Testing One of the most critical considerations is the potential presence of asbestos in your popcorn ceiling. Asbestos was commonly used in popcorn ceilings installed before the 1980s. Before you start any removal process, it's essential to have your ceiling tested for asbestos by a certified professional. If asbestos is found, you will need to hire a licensed abatement contractor to safely remove the ceiling. Health Risks Even if your ceiling doesn't contain asbestos, the removal process can generate a significant amount of dust and debris. Proper safety precautions, such as wearing a mask, goggles, and protective clothing, are essential to protect yourself from inhaling dust and other particles. **Preparation and Protection Room Preparation Removing a popcorn ceiling is a messy job. You will need to prepare the room by covering floors, walls, and furniture with plastic sheeting or drop cloths. Remove any light fixtures, ceiling fans, and other items attached to the ceiling. This preparation will help minimize cleanup time and protect your belongings from damage. Ventilation Proper ventilation is crucial during the removal process. Open windows and use fans to ensure good airflow, which will help reduce dust accumulation and improve air quality in the room. **Tools and Techniques Necessary Tools You will need several tools for popcorn ceiling removal, including a spray bottle, a wide putty knife or scraper, a ladder, and a drywall sander. Ensure you have all the necessary tools before starting the project to avoid interruptions. Wet Method One of the most effective methods for removing popcorn ceilings is the wet method. Lightly misting the ceiling with water helps soften the texture, making it easier to scrape off. Be careful not to over-saturate the ceiling, as excessive moisture can damage the underlying drywall. Dry Method The dry method involves scraping the popcorn texture without using water. This method generates more dust and requires more effort, but it can be effective if the ceiling is already damaged or if you prefer not to introduce moisture to the room. **Post-Removal Considerations Repairing the Ceiling After removing the popcorn texture, you may find imperfections or damage to the ceiling. You will need to patch holes, sand rough spots, and possibly apply a skim coat to achieve a smooth finish. This step is crucial for ensuring a professional-looking result. Choosing a New Finish Once the ceiling is smooth and repaired, you can choose a new finish. Options include a simple coat of paint, a smooth plaster finish, or a different texture. Consider your design preferences and consult with a professional to determine the best option for your space. Professional Help While some homeowners opt for DIY popcorn ceiling removal, hiring a professional can save time, ensure safety, and deliver a higher-quality finish. At Calgary Drywallers, we have the expertise and equipment to handle popcorn ceiling removal efficiently and effectively. Conclusion Removing a popcorn ceiling can significantly update the look of your home, but it requires careful planning and consideration. From asbestos testing to choosing a new finish, each step is crucial to achieving the desired result. If you're in Calgary, Alberta, and need assistance with your popcorn ceiling removal, contact Calgary Drywallers. Our experienced team is here to help you transform your ceilings and enhance the beauty of your home.
16 May, 2024
When it comes to maintaining and enhancing your property's value, the condition and quality of your drywall play a crucial role. At Calgary Drywallers, we understand that drywall is more than just a backdrop for your interior decor; it's a significant factor in the overall appeal, functionality, and worth of your home. In this article, we’ll explore how drywall affects your property’s worth and why maintaining it should be a top priority. 1. First Impressions Matter The first thing potential buyers or appraisers notice when they walk into a home is the condition of the walls. Smooth, flawless drywall surfaces create a sense of cleanliness and maintenance, while cracked, stained, or damaged drywall can give the impression of neglect. A well-maintained drywall surface can make a significant difference in creating a positive first impression, which is crucial when it comes to property valuation. 2. Structural Integrity and Safety Drywall is not just a cosmetic feature; it also contributes to the structural integrity of your home. Properly installed and maintained drywall can help prevent issues such as moisture intrusion, which can lead to mold growth and other structural problems. Ensuring your drywall is in good condition helps maintain the safety and soundness of your property, which is a critical factor in its overall value. 3. Energy Efficiency High-quality drywall installation, combined with proper insulation, can significantly improve your home’s energy efficiency. Well-insulated walls help maintain a consistent indoor temperature, reducing the load on your heating and cooling systems. This not only lowers your energy bills but also makes your home more appealing to eco-conscious buyers, potentially increasing its market value. 4. Acoustic Properties Drywall plays a key role in the acoustic properties of a home. Soundproofing with double layers of drywall or specialized acoustic drywall can enhance the living experience by reducing noise transmission between rooms. This is particularly important in multi-story homes and urban environments where noise can be a significant concern. Enhanced acoustic properties can add to your home’s desirability and market value. 5. Aesthetics and Customization Drywall offers endless possibilities for customization and design. From textured finishes to unique paint colors and wall treatments, drywall serves as a versatile canvas for your interior design ideas. Homes with well-executed drywall work that showcases modern or unique design elements can stand out in the real estate market, potentially increasing their appeal and value. 6. Ease of Maintenance and Repair One of the benefits of drywall is its ease of maintenance and repair. Minor damages such as dents and holes can be quickly patched and painted, restoring the wall to its original condition. This ease of upkeep means that maintaining the appearance and integrity of your walls is manageable, which is an attractive feature for potential buyers who value low-maintenance properties. 7. Compliance with Building Codes Proper drywall installation ensures compliance with local building codes and standards. Non-compliance can lead to issues when it comes time to sell your home, as buyers may be hesitant to purchase a property that doesn’t meet safety and construction standards. Ensuring your drywall work is up to code protects your investment and maintains the property’s market value. 8. Impact on Appraisals and Inspections When appraisers and inspectors evaluate a property, they look at the overall condition of the home, including the drywall. Walls that are in good shape can positively influence the appraisal value of your home. On the other hand, damaged or poorly installed drywall can raise red flags during inspections, potentially leading to lower appraisals or even deterring buyers. 9. Return on Investment (ROI) Investing in high-quality drywall installation and repair can offer a substantial return on investment. Whether you’re renovating to sell or simply upgrading your home, the money spent on improving your drywall can pay off by increasing your property’s market value and making it more attractive to buyers. 10. Expertise Matters At Calgary Drywallers, we understand that the quality of drywall work can make a significant difference in your home’s value. Our team of experienced professionals ensures that every drywall project is completed to the highest standards, using the best materials and techniques. We take pride in enhancing the beauty, functionality, and worth of homes in Calgary through expert drywall services. In conclusion, drywall plays a pivotal role in your property’s overall appeal and value. From structural integrity and energy efficiency to aesthetics and ease of maintenance, high-quality drywall work can significantly enhance your home’s worth. Trust the experts at Calgary Drywallers to help you maintain and improve your property with our professional drywall services. Contact us today to learn more about how we can assist you in maximizing your home’s value.
More Posts

Request A Free Estimate!

Share by: