Blog
Welcome To Our Blog!
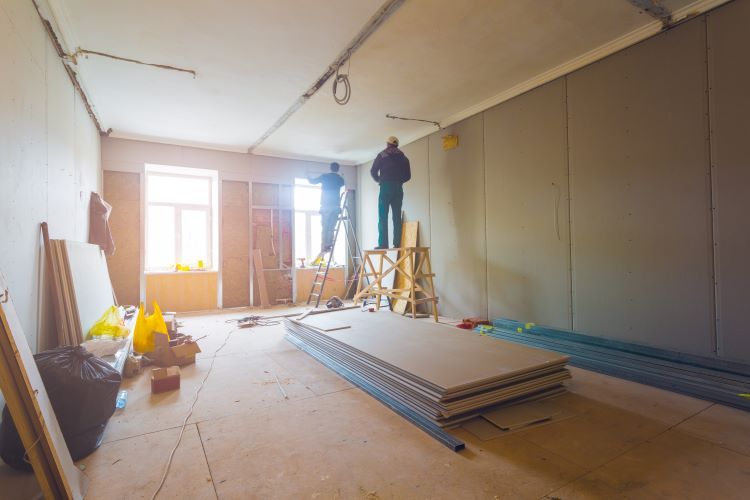
Drywall installation is a crucial step in any construction or renovation project. When done correctly, it provides a smooth and durable surface for painting or wallpapering. However, even seasoned professionals can make mistakes that can compromise the quality of the finished result. At Calgary Drywallers, we understand the importance of flawless drywall installation , which is why we've compiled a list of common mistakes to avoid: 1. Poor Measuring and Cutting: One of the most common mistakes in drywall installation is inaccurate measuring and cutting. Cutting drywall panels too short or too long can lead to gaps or uneven joints, resulting in a less-than-perfect finish. To avoid this mistake, always measure twice and cut once, ensuring precise measurements before making any cuts. 2. Improper Screw Spacing: Another common mistake is improper screw spacing during installation. Using too few screws or spacing them too far apart can result in sagging or bulging drywall panels. Conversely, using too many screws can weaken the drywall and cause it to crack. Follow the manufacturer's guidelines for screw spacing, typically around 12 inches apart along the edges and 16 inches apart in the field. 3. Over-Tightening Screws: Over-tightening screws can also lead to problems during drywall installation. Tightening screws too much can break the paper facing of the drywall or cause the screw heads to sink below the surface, making it difficult to achieve a smooth finish. Use the right amount of pressure to secure the drywall firmly in place without damaging the panels. 4. Ignoring Proper Joint Treatment: Proper joint treatment is essential for achieving a seamless finish in drywall installation. Neglecting to properly tape and mud the joints can result in visible seams and cracks once the drywall is painted. Take the time to apply joint tape and multiple layers of joint compound, feathering the edges to blend them seamlessly with the surrounding surface. 5. Rushing the Finishing Process: Finally, rushing the finishing process is a common mistake that can compromise the quality of the final result. Applying paint or texture before the joint compound is fully dry can lead to cracking or bubbling, requiring additional repairs. Allow ample time for each coat of joint compound to dry completely before proceeding to the next step. At Calgary Drywallers, we take pride in our attention to detail and commitment to quality craftsmanship. Our experienced team of professionals understands the importance of avoiding common mistakes in drywall installation to ensure a flawless finish every time. If you're planning a drywall installation project in Calgary or the surrounding areas, trust the experts at Calgary Drywallers for superior results. Contact us today to learn more about our drywall services and schedule a consultation.
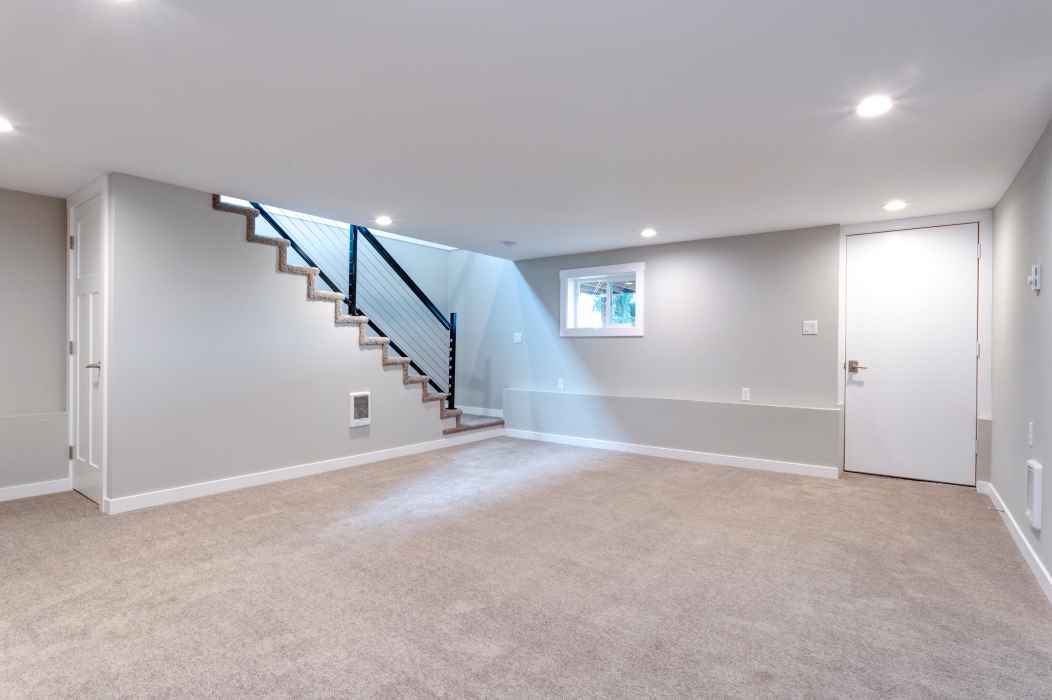
Finishing your basement can significantly enhance the functionality and value of your home. One crucial aspect of basement finishing is selecting the appropriate materials, including the type of drywall to use. In this article, we'll discuss the different options for drywall in basement finishing and provide insights to help you make an informed decision. 1. Moisture-Resistant Drywall: Basements are inherently more prone to moisture issues than other areas of the home due to their below-ground location. To mitigate the risk of moisture damage, it's essential to use moisture-resistant drywall, also known as green board or blue board. This type of drywall features a water-resistant gypsum core and is encased in a moisture-resistant paper facing, making it ideal for areas with high humidity levels, such as basements. 2. Mold-Resistant Drywall: In addition to moisture resistance, mold prevention is another critical consideration for basement finishing. Mold-resistant drywall, also known as purple board, is specially formulated to inhibit the growth of mold and mildew. It features a fiberglass facing that provides enhanced protection against moisture infiltration and mold proliferation, making it an excellent choice for basement environments where humidity levels may fluctuate. 3. Soundproof Drywall: If your basement will be used as a living space or entertainment area, you may want to consider installing soundproof drywall to minimize noise transmission between rooms. Soundproof drywall, also known as acoustic drywall, features an additional layer of material, such as gypsum or viscoelastic polymers, that absorbs sound vibrations and reduces sound transfer. This can create a more comfortable and peaceful environment in your basement, especially if you plan to use it for activities such as home theater or music rehearsal. 4. Fire-Resistant Drywall: Another consideration for basement finishing is fire safety. While building codes typically require fire-resistant materials in certain areas of the home, such as stairwells and utility rooms, using fire-resistant drywall throughout the basement can provide an added layer of protection in the event of a fire. Fire-resistant drywall, also known as Type X drywall, contains additives that enhance its fire resistance properties, reducing the spread of flames and smoke. 5. Standard Drywall: In some cases, standard drywall may be suitable for basement finishing, particularly in areas where moisture and mold are not significant concerns. Standard drywall is the most common type of drywall used in residential construction and is suitable for interior wall and ceiling applications. However, it's essential to ensure proper moisture management and ventilation to prevent issues such as mold growth and deterioration over time. Conclusion: When it comes to basement drywall finishing, choosing the right type of drywall is crucial for ensuring durability, longevity, and indoor air quality. Whether you opt for moisture-resistant, mold-resistant, soundproof, fire-resistant, or standard drywall, consulting with experienced professionals like Calgary Drywallers can help you make the best decision for your basement finishing project. With the right materials and proper installation techniques, you can transform your basement into a functional, comfortable, and inviting space for years to come.
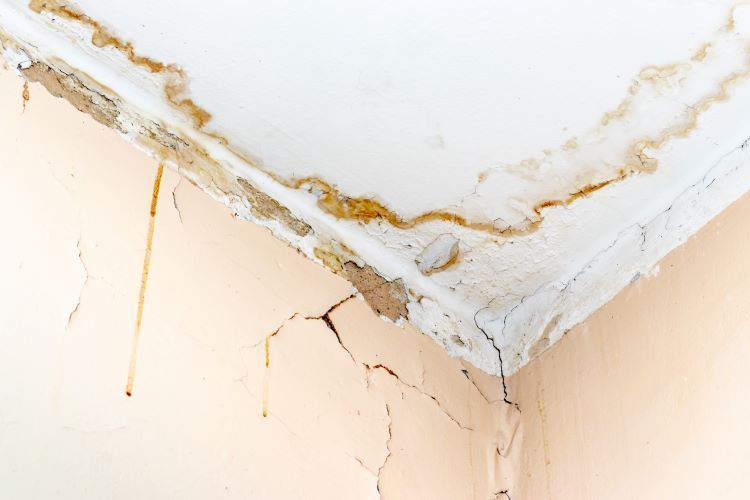
Water damage can wreak havoc on your home, causing unsightly stains, weakening structural integrity, and fostering mold growth. As a homeowner, it's crucial to be able to identify signs of water damage on drywall so that you can address the issue promptly. In this blog post, we'll discuss how to recognize water damage on drywall and the steps you can take to repair and prevent further damage. Signs of Water Damage on Drywall: Discoloration: One of the most obvious signs of water damage on drywall is discoloration. Look for yellow or brown stains on the walls or ceiling, which indicate moisture absorption and potential mold growth. Swelling or Bubbling: When drywall is exposed to water, it can swell or bubble as the moisture penetrates the material. Check for areas where the drywall appears swollen or where the paint is bubbling or peeling away from the surface. Soft or Spongy Texture: Wet drywall may feel soft or spongy to the touch, especially in areas where the damage is extensive. Press gently on the surface of the drywall to check for any areas that give way or feel unusually soft. Musty Odor: Water damage often creates a musty or moldy odor in the affected area. If you notice a persistent odor, especially in areas prone to moisture, it could be a sign of hidden water damage behind the drywall. Visible Mold Growth: Mold thrives in damp, humid environments, making water-damaged drywall an ideal breeding ground. Keep an eye out for any visible mold growth on the surface of the drywall or in nearby areas. Steps to Address Water Damage on Drywall: Identify and Repair the Source: Before addressing the water damage on the drywall, it's essential to identify and repair the source of the water intrusion. Common sources of water damage include leaky pipes, roof leaks, and plumbing issues. Once the source has been addressed, you can focus on repairing the damage. Remove Damaged Material: In cases of severe water damage, it may be necessary to remove the affected drywall completely. Use a utility knife to cut away any swollen or damaged sections of drywall, being careful not to cut into the underlying structure. Dry Out the Area: Once the damaged drywall has been removed, allow the area to dry thoroughly before proceeding with repairs. Use fans, dehumidifiers, and open windows to promote airflow and speed up the drying process. Replace Damaged Drywall: After the area has dried completely, replace the damaged drywall with new material. Be sure to measure and cut the drywall to fit the space accurately, and secure it in place with drywall screws. Patch and Finish: Once the new drywall is installed, patch any seams or gaps with drywall compound and sand the surface smooth. Apply primer and paint to match the surrounding area, ensuring a seamless finish. Preventing Future Water Damage: Regular Maintenance: Stay vigilant for signs of water damage and address any leaks or moisture issues promptly. Proper Ventilation: Ensure proper ventilation in areas prone to moisture, such as bathrooms, kitchens, and basements, to prevent condensation and mold growth. Sealant Application: Apply waterproof sealant to vulnerable areas, such as around windows, doors, and plumbing fixtures, to prevent water intrusion. Gutter Maintenance: Keep gutters clean and free of debris to prevent water from pooling near the foundation of your home. By knowing how to identify water damage on drywall and taking prompt action to address it, you can protect your home from further damage and ensure the health and safety of your family. If you're dealing with water damage on your drywall, don't hesitate to contact Calgary Drywallers for professional assistance and repairs.
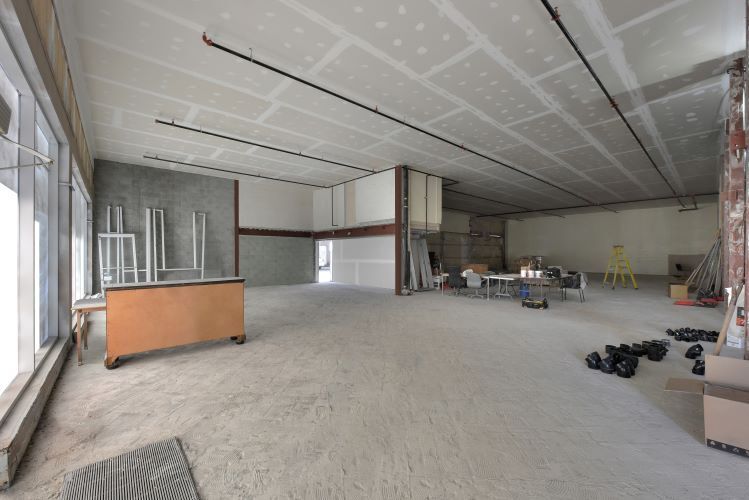
When it comes to commercial construction projects, selecting the right materials is crucial for ensuring durability, efficiency, and overall success. Drywall plays a significant role in the construction of commercial buildings, providing structural support, insulation, and a smooth, finished surface. In this blog post, we'll explore the types of drywall commonly used in commercial buildings and how Calgary Drywallers can help you choose the right option for your project in Calgary, Alberta. 1. Standard Drywall: Standard drywall, also known as gypsum board or sheetrock, is the most common type of drywall used in commercial construction. It consists of a gypsum core sandwiched between layers of paper or fiberglass. Standard drywall is versatile, cost-effective, and suitable for a wide range of applications, including interior walls and ceilings. 2. Fire-Rated Drywall: Fire-rated drywall is specially designed to provide enhanced fire resistance, making it ideal for use in areas where fire protection is a priority, such as stairwells, corridors, and mechanical rooms. This type of drywall is formulated with additives that slow the spread of flames and reduce smoke production in the event of a fire. 3. Moisture-Resistant Drywall: Moisture-resistant drywall, also known as green board or blue board, is engineered to withstand high levels of moisture and humidity. It features a water-resistant gypsum core and moisture-resistant paper facing, making it suitable for use in bathrooms, kitchens, and other damp environments where standard drywall might be prone to damage. 4. Soundproof Drywall: Soundproof drywall, also known as acoustic drywall or sound-dampening drywall, is designed to reduce sound transmission between rooms and floors. It typically features a thicker gypsum core and additional layers of sound-absorbing materials, such as fiberglass or foam. Soundproof drywall is commonly used in office buildings, hotels, and other commercial spaces where noise control is essential. 5. Impact-Resistant Drywall: Impact-resistant drywall is engineered to withstand heavy impacts and resist damage from everyday wear and tear. It features a reinforced core and durable paper facing that help prevent dents, dings, and scratches. Impact-resistant drywall is often used in high-traffic areas such as corridors, lobbies, and retail spaces where walls are prone to damage. 6. Mold-Resistant Drywall: Mold-resistant drywall is formulated with additives that inhibit the growth of mold and mildew, making it an excellent choice for commercial buildings in humid climates or areas prone to moisture issues. It features a moisture-resistant gypsum core and specially treated paper facing that help prevent mold growth on the surface of the drywall. Conclusion: Choosing the right type of drywall is essential for ensuring the long-term durability, safety, and performance of your commercial building. At Calgary Drywallers, we specialize in providing high-quality drywall products and expert installation services tailored to your specific needs and requirements. Contact us today to learn more about our commercial drywall solutions and how we can help bring your project to life in Calgary, Alberta.
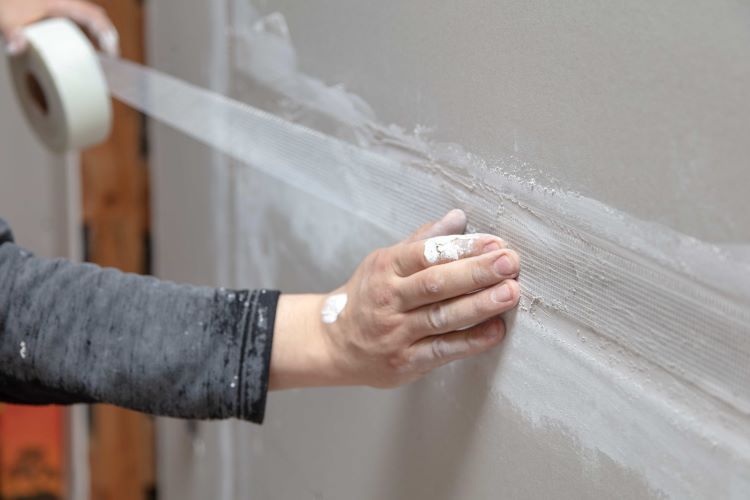
When it comes to achieving a seamless and polished finish for your walls and ceilings, drywall taping plays a pivotal role. This essential step in the drywall installation process ensures that joints, corners, and fastener indentations are properly concealed and smoothed out, creating a uniform surface ready for painting or wallpapering. Let's delve into what drywall taping involves and why it's crucial for achieving professional-looking results. 1. Preparation: Before beginning the taping process, it's essential to prepare the drywall surfaces properly. This involves ensuring that the drywall sheets are installed correctly, with minimal gaps between them, and that any fasteners or screws are countersunk below the surface. Additionally, the drywall should be free from dust, debris, and any imperfections that could affect the taping process. 2. Applying Joint Compound: The first step in drywall taping is applying joint compound, also known as mud, over the joints between drywall sheets, as well as over screws or nails used to secure the drywall to the framing. Joint compound is spread evenly over the joints using a taping knife, ensuring that it fills any gaps or depressions and covers the fasteners completely. 3. Embedding Tape: Once the joint compound is applied, paper or fiberglass mesh tape is embedded into the wet compound along the length of the joint. This tape reinforces the joint, preventing cracks or separation between drywall sheets. The tape is smoothed out with a taping knife to remove any air bubbles or wrinkles and ensure proper adhesion to the joint compound. 4. Second Coat of Joint Compound: After the tape is embedded, a second coat of joint compound is applied over the tape to cover it completely and create a smooth, seamless surface. This coat is applied wider than the first coat, feathering the edges to blend with the surrounding drywall and minimize the appearance of seams. 5. Feathering and Sanding: Once the second coat of joint compound is dry, the surface is smoothed out by feathering the edges with a taping knife to create a gradual transition between the taped areas and the rest of the drywall. Any imperfections or high spots are then sanded down using fine-grit sandpaper, resulting in a smooth and even surface ready for painting or texture application. 6. Final Touches: After sanding, a final coat of joint compound may be applied to fill in any remaining imperfections or to further smooth out the surface. Once dry, the surface is inspected for quality, and any necessary touch-ups or spot sanding is performed before proceeding to the finishing stage. Conclusion: Drywall taping is a meticulous process that requires skill, patience, and attention to detail. By properly taping and finishing drywall joints, corners, and fasteners, Calgary Drywallers ensures that your walls and ceilings have a professional-looking finish that enhances the overall aesthetics of your space. Contact us today to learn more about our drywall taping services and how we can help you achieve the perfect finish for your project.
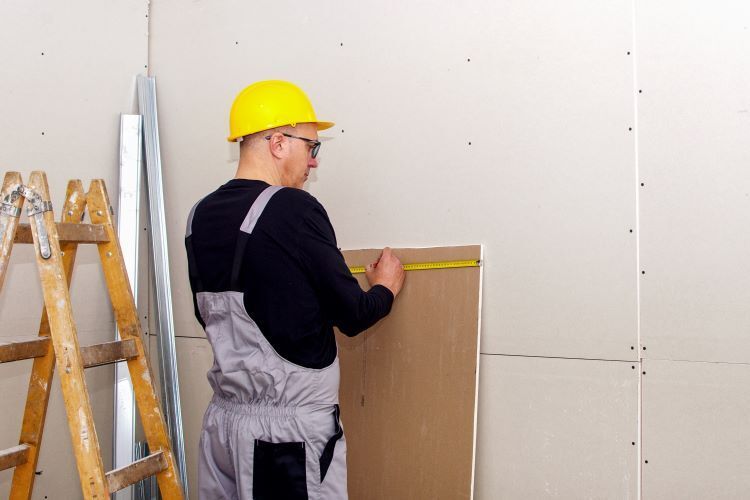
Drywall installation is a crucial step in creating a polished and finished look for your home's interior walls. Whether you're tackling a small repair or embarking on a larger renovation project, mastering the art of drywall can save you time, money, and frustration. At Calgary Drywallers, we understand the importance of achieving professional-quality results, which is why we've compiled some expert tips and tricks to help you navigate the drywall process like a pro. 1. Choose the Right Drywall: Selecting the appropriate type of drywall for your project is essential for achieving optimal results. Consider factors such as moisture resistance, fire resistance, and soundproofing properties when choosing between standard drywall, moisture-resistant drywall (green board), or fire-resistant drywall (Type X). 2. Measure Twice, Cut Once: Accurate measurements are critical for achieving seamless drywall installations. Take the time to measure your space carefully and mark your drywall panels before cutting. Use a straight edge and a sharp utility knife to make clean, precise cuts, ensuring a perfect fit for each panel. 3. Minimize Joints and Seams: Whenever possible, try to minimize the number of joints and seams in your drywall installation. Opt for larger panels to cover more area with fewer seams, and stagger panel joints to create a more uniform and seamless finish. 4. Use Drywall Screws: When securing drywall panels to studs or joists, use drywall screws instead of nails for a stronger and more secure hold. Be sure to drive the screws slightly below the surface of the drywall without breaking the paper face to facilitate mudding and taping. 5. Apply Drywall Tape Correctly: Proper application of drywall tape is crucial for creating smooth and seamless joints between drywall panels. Use self-adhesive mesh tape for inside corners and paper tape for flat seams. Apply a thin layer of joint compound over the tape, feathering the edges to blend seamlessly with the surrounding drywall. 6. Practice Feathering Technique: Achieving a smooth and seamless finish requires mastering the feathering technique when applying joint compound. Start by applying a thin coat of compound over the taped seams and screw indentations, then gradually build up additional layers, feathering the edges with each pass to eliminate ridges and imperfections. 7. Sand Between Coats: To achieve a flawless finish, sanding between coats of joint compound is essential. Use fine-grit sandpaper or a sanding sponge to smooth out any imperfections or rough patches before applying additional coats of compound. Be sure to clean up any dust before proceeding to the next coat. 8. Prime Before Painting: Before painting your drywall, be sure to apply a coat of primer to seal the surface and ensure optimal paint adhesion. Choose a high-quality primer suitable for drywall surfaces and allow it to dry completely before applying your desired paint color. By following these expert tips and tricks, you can tackle your drywall projects with confidence and achieve professional-quality results every time. Whether you're a seasoned DIY enthusiast or a first-time homeowner, Calgary Drywallers is here to support you every step of the way. Contact us today to learn more about our comprehensive drywall services and how we can bring your vision to life.

Drywall cracks are a common issue that many homeowners encounter, but they don't have to be a permanent eyesore. With the right preventative measures and repair techniques, you can keep your walls looking smooth and flawless for years to come. In this article, we'll discuss how you can prevent and fix drywall cracks with expert advice from Calgary Drywallers. Prevention Tips: Proper Installation: Ensure that your drywall is installed correctly by experienced professionals like Calgary Drywallers. Proper installation techniques minimize the risk of cracks developing later on. Use High-Quality Materials: Invest in high-quality drywall and joint compound to minimize the likelihood of cracks forming. Cheaper materials may be more prone to cracking over time. Control Humidity Levels: Fluctuations in humidity can cause drywall to expand and contract, leading to cracks. Use a dehumidifier or air conditioner to maintain consistent humidity levels in your home. Monitor Structural Changes: Keep an eye out for signs of structural movement, such as doors sticking or windows not closing properly. Addressing underlying structural issues promptly can prevent drywall cracks from forming. Proper Framing Techniques: Ensure that walls are properly framed to provide adequate support for the drywall. Properly spaced studs and headers can help prevent stress on the drywall joints. Repair Techniques: Patch and Sand: For minor cracks, patch the affected area with joint compound using a putty knife. Once dry, sand the area smooth with fine-grit sandpaper. Use Mesh Tape: For larger cracks or areas of damage, apply self-adhesive mesh tape over the crack before applying joint compound. This provides additional reinforcement and helps prevent the crack from reappearing. Apply Multiple Coats: Apply multiple thin coats of joint compound, allowing each coat to dry completely before applying the next. Sand between coats to achieve a smooth finish. Prime and Paint: Once the repaired area is smooth and dry, prime it with a high-quality primer before painting. This helps ensure proper adhesion and a seamless finish. Address Underlying Issues: If cracks continue to reappear despite your best efforts, there may be underlying structural issues that need to be addressed. Consult with a professional like Calgary Drywallers to assess the situation and determine the best course of action. By following these preventative measures and repair techniques, you can keep your drywall looking flawless and free of cracks. If you're in need of professional drywall installation or repair services in Calgary, trust the experts at Calgary Drywallers to get the job done right. Contact us today to schedule a consultation and learn more about how we can help you achieve the perfect walls for your home.
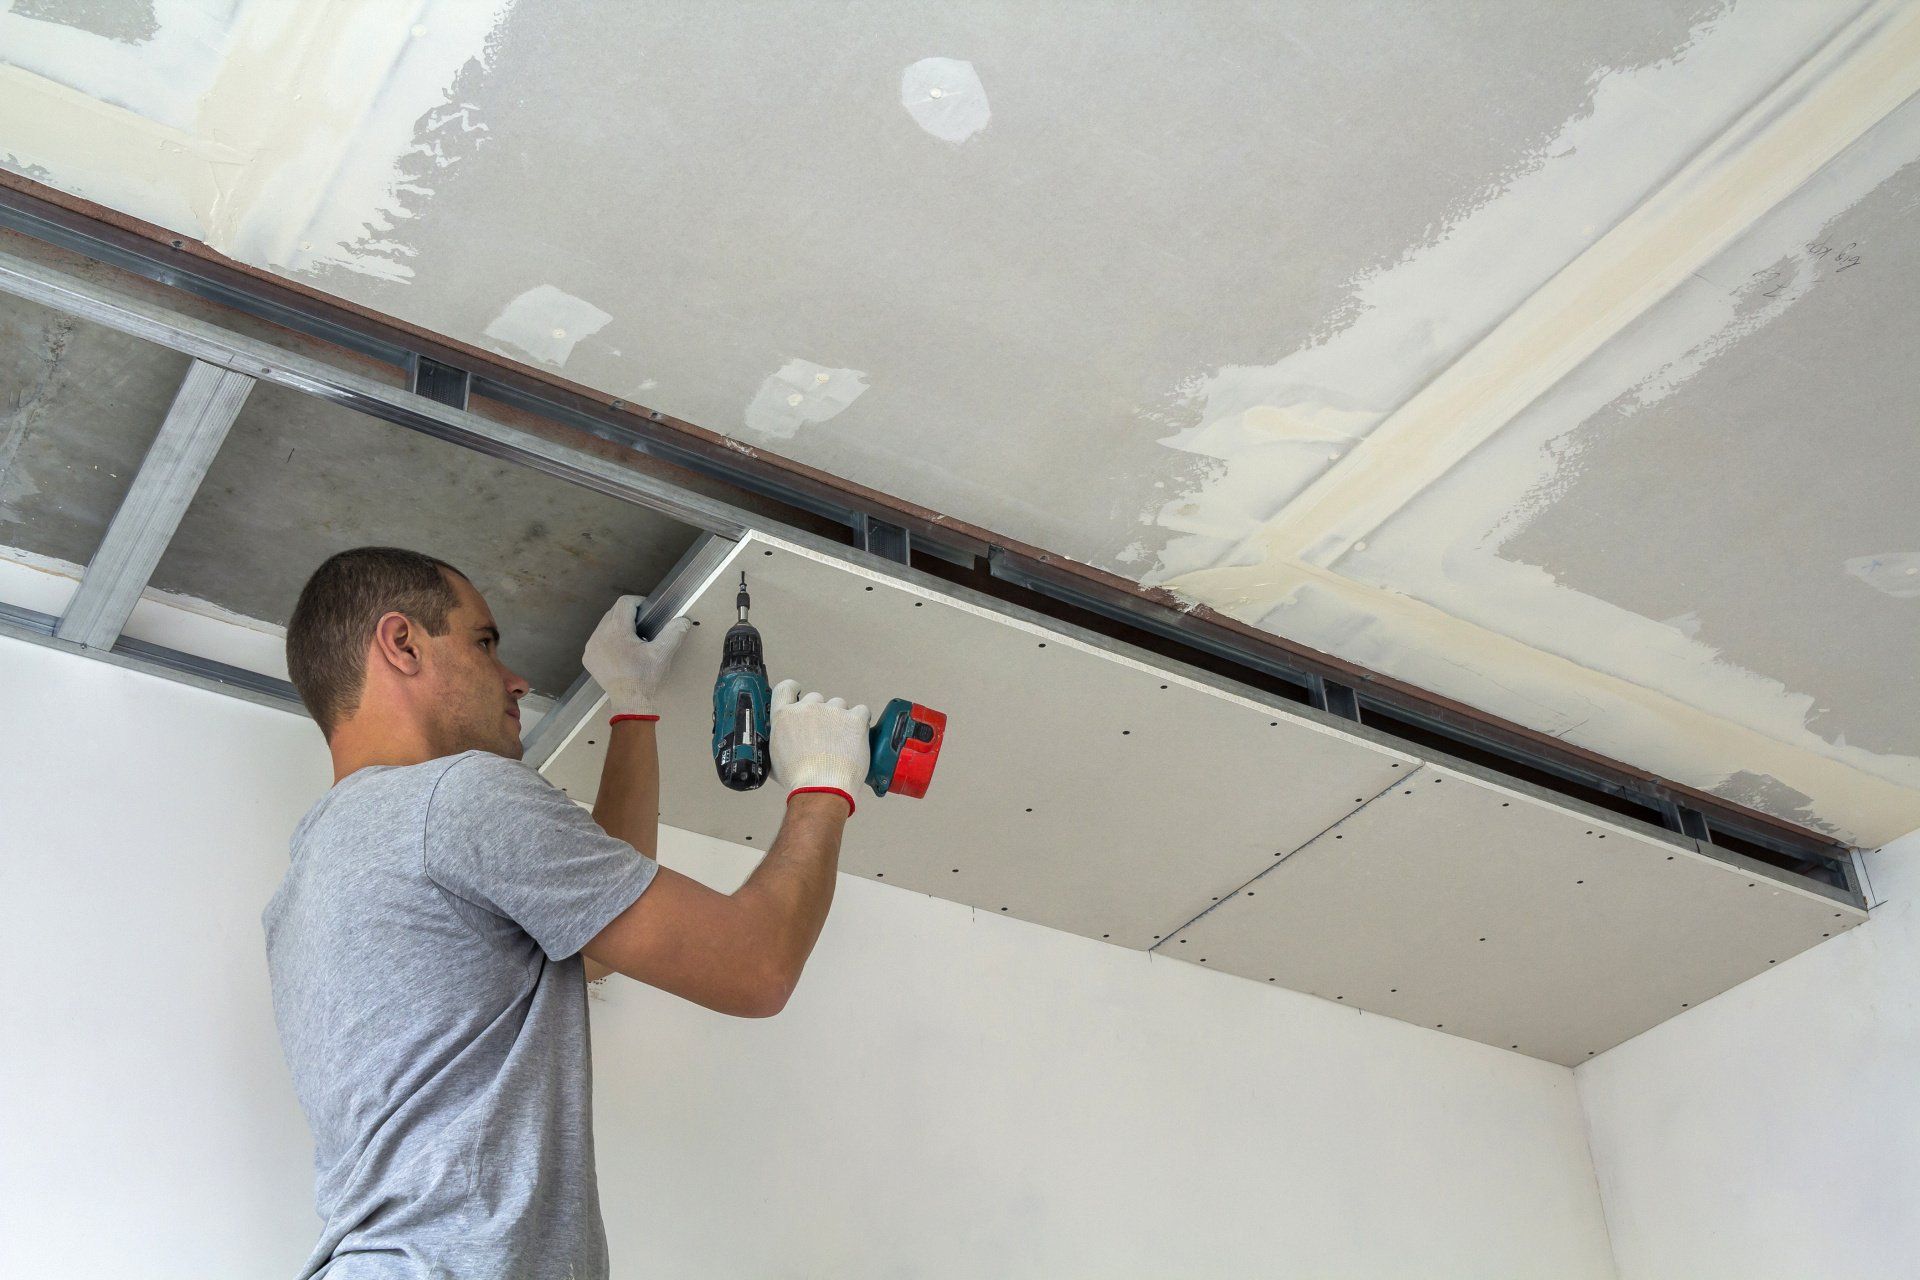
Drywalling a ceiling may seem like a daunting task, but with the right techniques and know-how, you can achieve professional results. At Calgary Drywallers, we specialize in providing expert drywall services to homeowners in Calgary, Alberta. In this guide, we'll walk you through the process of drywalling a ceiling and share valuable tips to ensure a smooth and successful installation. 1. Gather Your Materials: Before you begin, make sure you have all the necessary materials and tools on hand. This includes drywall panels, screws, joint tape, joint compound (mud), a drywall saw or utility knife, a screw gun or drill, a drywall lift or assistance, and safety gear such as goggles and gloves. 2. Measure and Cut the Drywall: Start by measuring the dimensions of your ceiling to determine how many drywall panels you'll need. Use a drywall saw or utility knife to cut the panels to size, ensuring they fit snugly against the walls and each other. For ceilings with obstructions like light fixtures or vents, measure and mark the locations on the drywall panels before cutting. 3. Install the First Panel: Begin by installing the first drywall panel along one edge of the ceiling, with the long edge perpendicular to the ceiling joists. Use a drywall lift or assistance to hold the panel in place while you screw it into the joists, spacing the screws approximately 12 inches apart along the edges and 16 inches apart in the field. 4. Continue Installing Panels: Once the first panel is in place, continue installing additional panels, working your way across the ceiling in rows. Stagger the panels so that the seams do not line up, which helps to strengthen the ceiling and reduce the risk of cracks. Use a drywall lift or assistance to hold the panels in place while you screw them into the joists. 5. Tape and Mud the Joints: Once all the drywall panels are installed, it's time to tape and mud the joints. Apply joint tape to the seams between the panels, pressing it firmly into the wet mud. Use a drywall knife to smooth out any excess mud and feather the edges. Allow the mud to dry completely before sanding and applying additional coats as needed. 6. Sand and Finish: After the mud has dried, use sandpaper or a sanding sponge to smooth out any rough spots and create a seamless surface. Be sure to wear a dust mask to protect yourself from inhaling dust particles. Once the surface is smooth, you can prime and paint the ceiling to complete the installation. Expert Tips: Use a drywall lift or enlist the help of a friend to hold the drywall panels in place while you screw them into the joists. Work carefully and methodically to ensure accurate measurements and precise cuts. Take breaks as needed to avoid fatigue and maintain focus throughout the installation process. Don't rush the taping and mudding process—take your time to achieve a smooth and professional finish. By following these steps and tips, you can confidently tackle the task of drywalling a ceiling and achieve professional-quality results. If you prefer to leave the job to the experts, Calgary Drywallers is here to help. Contact us today for all your drywall installation needs in Calgary, Alberta.

Is there a hole or dent in your drywall that's been bothering you? Don't worry – with the right tools and techniques, you can patch it up like a pro. In this step-by-step guide brought to you by Calgary Drywallers in Calgary, Alberta, we'll walk you through the process of patching a hole in drywall, along with the tools and materials you'll need to get the job done right. Materials Needed: Drywall patch Joint compound (mud) Drywall tape (optional) Sandpaper (medium grit) Primer Paint Tools Needed: Utility knife Putty knife Drywall saw or rotary tool with cutting bit Measuring tape Pencil Drywall screws or nails Drywall sanding block or sanding sponge Paintbrush or roller Step 1: Prepare the Area Start by removing any loose or damaged drywall around the hole using a utility knife or drywall saw. Clean the area to ensure there's no dust or debris that could affect the adhesion of the patch. Step 2: Cut the Patch Measure the dimensions of the hole and cut a piece of drywall patch slightly larger than the hole using a utility knife or drywall saw. Make sure the patch fits snugly into the hole without overlapping the surrounding drywall. Step 3: Attach the Patch If the hole is large or irregularly shaped, you may need to create a backing for the patch using scrap wood or drywall. Secure the backing behind the hole with drywall screws or nails, then attach the patch over the hole using drywall screws or adhesive. Step 4: Apply Joint Compound Using a putty knife, apply a thin layer of joint compound (mud) over the patch, extending it slightly beyond the edges of the patch to blend with the surrounding drywall. If necessary, apply drywall tape over the seams before applying the joint compound for added reinforcement. Step 5: Smooth and Feather the Edges Once the joint compound is dry, use sandpaper or a sanding block to smooth and feather the edges of the patch, blending it seamlessly with the surrounding drywall. Be sure to remove any excess joint compound to achieve a smooth finish. Step 6: Prime and Paint After sanding, wipe away any dust with a damp cloth and allow the area to dry completely. Apply a coat of primer to the patched area to ensure proper adhesion of the paint, then paint the patch to match the surrounding wall. Step 7: Finishing Touches Once the paint is dry, inspect the patched area for any imperfections and touch up as needed. Congratulations – you've successfully patched a hole in your drywall! Conclusion: Patching a hole in drywall may seem daunting, but with the right tools and techniques, it's a straightforward DIY project that anyone can tackle. If you'd rather leave it to the professionals, Calgary Drywallers is here to help. Contact us today for expert drywall repair services and enjoy flawless results that will make your walls look as good as new.
Drywall is a fundamental component of modern construction, providing a smooth and durable surface for interior walls and ceilings. As the leading drywall company in Calgary, Alberta, we understand the importance of selecting the right type of drywall for your project. In this guide, we'll explore the different types of drywall materials available and their unique characteristics. 1. Standard Drywall: Also known as gypsum board or plasterboard, standard drywall is the most common type used in residential and commercial construction. It consists of gypsum plaster sandwiched between layers of paper and is available in various thicknesses, ranging from 1/4 inch to 3/4 inch. Standard drywall is versatile, easy to install, and suitable for most interior applications. 2. Fire-Resistant Drywall: Fire-resistant drywall, also known as Type X drywall, is specially formulated to provide increased fire resistance. It contains additives such as glass fibers and other fire-retardant materials that slow down the spread of flames in the event of a fire. Fire-resistant drywall is typically installed in areas where building codes require additional fire protection, such as garages, utility rooms, and shared walls between units. 3. Moisture-Resistant Drywall: Moisture-resistant drywall, also known as green board or blue board, is designed to withstand high humidity and moisture levels without deteriorating. It features a water-resistant paper facing that helps prevent mold and mildew growth in areas prone to moisture, such as bathrooms, kitchens, and basements. Moisture-resistant drywall is not waterproof but provides added protection against moisture damage compared to standard drywall. 4. Soundproof Drywall: Soundproof drywall, also known as acoustic drywall or sound-rated drywall, is engineered to reduce sound transmission between rooms and improve acoustics within a space. It features multiple layers of gypsum and sound-dampening materials, such as viscoelastic polymers or mineral wool, which absorb and dissipate sound waves. Soundproof drywall is commonly used in home theaters, recording studios, and multi-family dwellings to minimize noise transfer between units. 5. Impact-Resistant Drywall: Impact-resistant drywall, also known as abuse-resistant drywall, is designed to withstand damage from impacts and physical abuse. It features a reinforced core and a durable paper facing that provides increased resistance to dents, scratches, and punctures. Impact-resistant drywall is ideal for high-traffic areas such as hallways, stairwells, and commercial spaces where walls are prone to damage from everyday wear and tear. Conclusion: Choosing the right type of drywall is essential for achieving optimal results in your construction or renovation project. Whether you need standard drywall for general-purpose applications or specialized drywall for specific requirements such as fire resistance, moisture resistance, soundproofing, or impact resistance, Calgary Drywallers has the expertise and resources to meet your needs. Contact us today to learn more about our drywall services and discover the perfect drywall solution for your project!